こんにちわ。めんどいことは極力排除したいマン、ナコです。
私はとにかくめんどくさがりなので、楽ちんに楽しい記事がかけるよう日々研究しています。
(ほんとはアタマに浮かんだ言葉全部自動で入力して欲しいよ!)
めちゃ眠い夜、ブログを書く時にソースコードやタグをコピペして編集する作業がとってもめんどくさくないですか?
今回追加した機能はそんな悩みを解決してくれます。
改行はどうかな?タグはボルドーだけいけるかな
よく見る吹き出しパーツ、とにかく楽したいので、限界まで手間を減らしました
方法1,2とありますが2がオススメです。とにかく早い。1秒でいける。
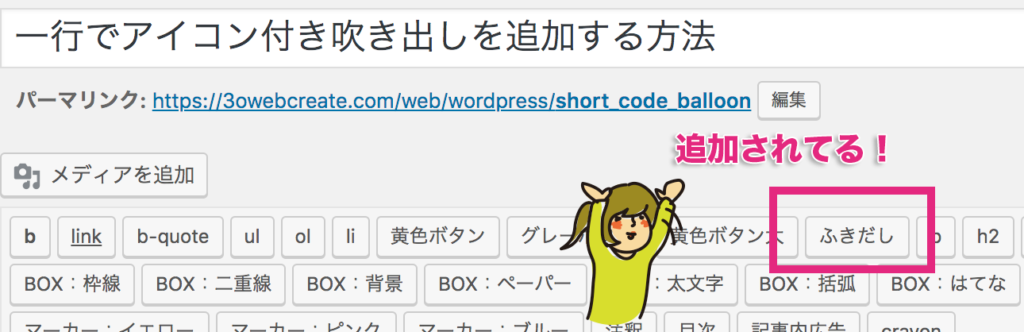
方法1 クイックタグに追加してワンタップで吹き出し追加
自由度高めの吹き出しをクイックタグに登録してボタン1つで呼び出す方法です。
完成図
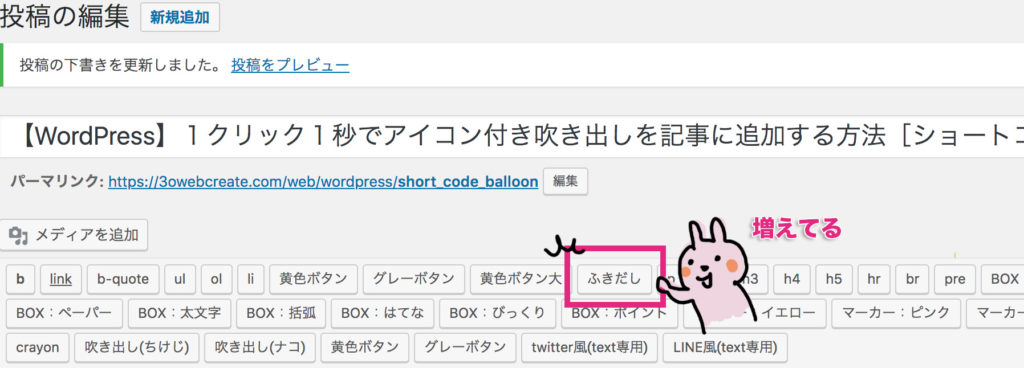
ぽんと押せば
実際にはこのようなショートコードが記事に追加されるので編集して使います。
[code_balloon position="left" name="名前" text="本文" img="アイコン画像URL"]
| position | leftかright:左右の吹き出し向きを指定します |
|---|---|
| name | 名前を入力してください |
| text | 吹き出し内のテキストです |
| img | アイコン画像のURLです。正方形の画像を指定してください |
更新履歴
2018/07/13
スマフォ表示の時は横幅100%になるようCSSに加筆
マージン調整
やり方
function.php
一番下に以下を追加
//////////////////////////////////////////////////
//クイックタグの追加
//////////////////////////////////////////////////

function add_button_quicktag() {
	?>
	<script type="text/javascript">
	QTags.addButton('code_balloon', 'ふきだし', '[code_balloon position="left" name="名前" text="本文" img="アイコン画像URL"]');
	</script>
	<?php
}
add_action('admin_print_footer_scripts', 'add_button_quicktag');

//////////////////////////////////////////////////
//吹き出しを表示するショートコード
//////////////////////////////////////////////////
function code_balloon_func($atts) {
	extract( shortcode_atts( array(
		'position' => '',
		'img' => '',
		'name' => '',
		'text' => '',
	), $atts ) );

	$code_balloon = <<<EOT
	<div class="balloon__contener">
    <div class="balloon__$position">
      <figure>
        <img src="$img" />
        <figcaption>$name</figcaption>
      </figure>
      <div class="balloon__text">
        $text
      </div>
    </div>
	</div>
EOT;
	return $code_balloon;

}

add_shortcode('code_balloon', 'code_balloon_func');
CSS
一番下に以下を追加
/*/////////////////////////////////////////////////
//チャット画面(会話方式)を記事に表示する方法
/////////////////////////////////////////////////*/

.balloon__contener {
  clear: both;
  width: 100%;
  padding: 10px 0;
}

.balloon__contener:after {
  content: ".";
  display: block;
  clear: both;
  height: 0;
  visibility: hidden;
}

.balloon__contener figure {
  width: 60px;
  position: absolute;
  padding: 0;
  margin: 0;
  top: 0;
}

.balloon__contener figure img {
  border-radius: 50%;
  width: 60px;
  height: 60px;
  border: solid 1px #dddddd;
}

.balloon__contener figure figcaption {
  color: #000000;
  width: 60px;
  position: absolute;
  top: 60px;
  text-align: center;
  font-size: 70%;
  line-height: 100%;
}

.balloon__contener .balloon__left {
  width: 100%;
  position: relative;
  display: block;
  max-width: 80%;
  clear: both;
}

.balloon__contener .balloon__left figure {
  left: 0;
}

.balloon__contener .balloon__left .balloon__text {
  margin-left: 80px;
  position: relative;
  padding: 20px;
  border-radius: 10px;
  background-color: #d8f4f8;
}

.balloon__contener .balloon__left .balloon__text::after {
  content: '';
  position: absolute;
  display: block;
  width: 0;
  height: 0;
  left: -10px;
  top: 12px;
  border-right: 15px solid #d8f4f8;
  border-top: 15px solid transparent;
  border-bottom: 15px solid transparent;
}

.balloon__contener .balloon__right {
  width: 100%;
  position: relative;
  display: block;
  float: right;
  max-width: 80%;
  clear: both;
}

.balloon__contener .balloon__right figure {
  right: 0;
}

.balloon__contener .balloon__right .balloon__text {
  margin-right: 80px;
  position: relative;
  padding: 20px;
  border-radius: 10px;
  background-color: #eeeeee;
}

.balloon__contener .balloon__right .balloon__text::after {
  content: '';
  position: absolute;
  display: block;
  width: 0;
  height: 0;
  right: -10px;
  top: 12px;
  border-left: 15px solid #eeeeee;
  border-top: 15px solid transparent;
  border-bottom: 15px solid transparent;
}


@media only screen and (max-width: 767px){
  .balloon__contener .balloon__left,
  .balloon__contener .balloon__right {
    max-width: 100%;
  }
}
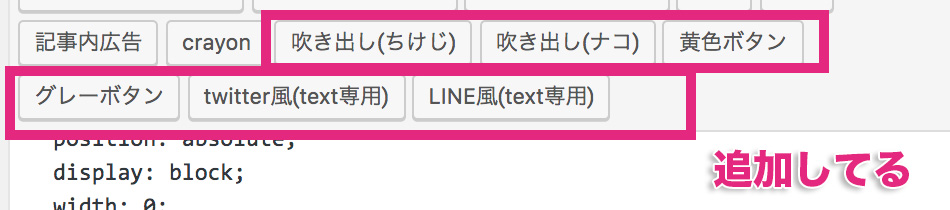
方法2 クイックタグに要素込みで追加してワンタップで吹き出し追加
登場人物が決まっている場合、要素ごと登録してボタン1つで呼び出す方法です。
ちょーーらくです。オススメです。
完成図
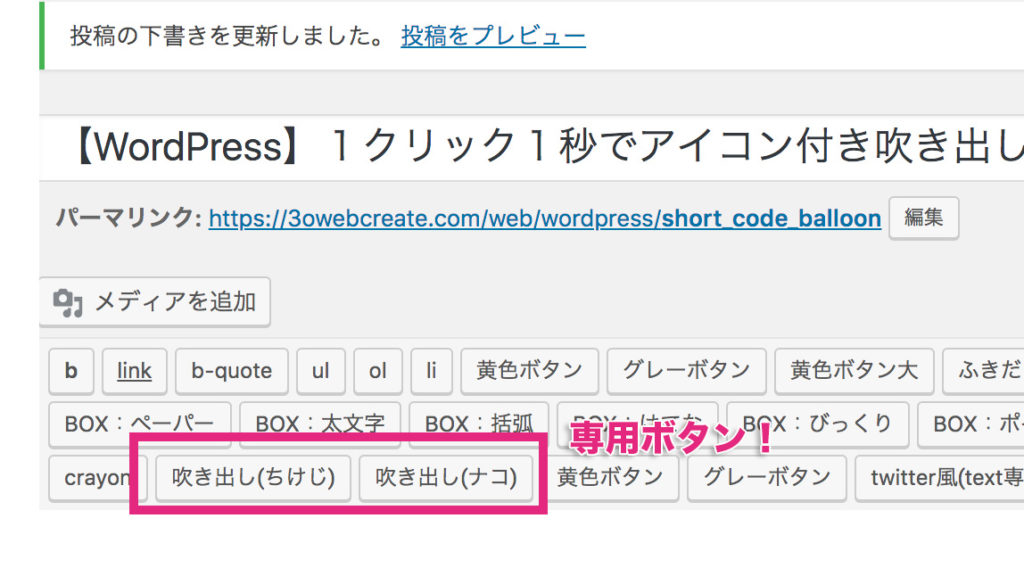
ぽんと押せば
やり方
function.php
一番下に以下を追加しクイックタグを追加します。それぞれ要素をいれてください。
今は2人分ですが同じ要領で何人分でもOKです。
//////////////////////////////////////////////////
//クイックタグの追加
//////////////////////////////////////////////////

function add_button_quicktag() {
	?>
	<script type="text/javascript">
	//それぞれ任意の名前をつけてください
	//QTags.addButton('code_balloon_任意', 'ボタン名', '[code_balloon position="左(left)か右(right)" name="アイコン下の名前" text="本文" img="画像のURL"]');
	QTags.addButton('code_balloon_ckj', '吹き出し(ちけじ)', '[code_balloon position="left" name="ちけじ" text="本文" img="ckj.jpg"]');
	QTags.addButton('code_balloon_nako', '吹き出し(ナコ)', '[code_balloon position="right" name="ナコ" text="本文" img="nako.jpg"]');
	</script>
	<?php
}
add_action('admin_print_footer_scripts', 'add_button_quicktag');

//////////////////////////////////////////////////
//吹き出しを表示するショートコード
//////////////////////////////////////////////////
function code_balloon_func($atts) {
	extract( shortcode_atts( array(
		'position' => '',
		'img' => '',
		'name' => '',
		'text' => '',
	), $atts ) );

	$code_balloon = <<<EOT
	<div class="balloon__contener">
    <div class="balloon__$position">
      <figure>
        <img src="$img" />
        <figcaption>$name</figcaption>
      </figure>
      <div class="balloon__text">
        $text
      </div>
    </div>
	</div>
EOT;
	return $code_balloon;

}

add_shortcode('code_balloon', 'code_balloon_func');
CSS
一番下に以下を追加
/*/////////////////////////////////////////////////
//チャット画面(会話方式)を記事に表示する方法
/////////////////////////////////////////////////*/

.balloon__contener {
  clear: both;
  width: 100%;
  padding: 10px 0;
}

.balloon__contener:after {
  content: ".";
  display: block;
  clear: both;
  height: 0;
  visibility: hidden;
}

.balloon__contener figure {
  width: 60px;
  position: absolute;
  padding: 0;
  margin: 0;
  top: 0;
  /* 正方形を用意 */
}

.balloon__contener figure img {
  border-radius: 50%;
  width: 60px;
  height: 60px;
  border: solid 1px #dddddd;
}

.balloon__contener figure figcaption {
  color: #000000;
  width: 60px;
  position: absolute;
  top: 60px;
  text-align: center;
  font-size: 70%;
  line-height: 100%;
}

.balloon__contener .balloon__left {
  width: 100%;
  position: relative;
  display: block;
  max-width: 80%;
  clear: both;
}

.balloon__contener .balloon__left figure {
  left: 0;
}

.balloon__contener .balloon__left .balloon__text {
  margin-left: 80px;
  position: relative;
  padding: 20px;
  border-radius: 10px;
  background-color: #d8f4f8;
}

.balloon__contener .balloon__left .balloon__text::after {
  content: '';
  position: absolute;
  display: block;
  width: 0;
  height: 0;
  left: -10px;
  top: 12px;
  border-right: 15px solid #d8f4f8;
  border-top: 15px solid transparent;
  border-bottom: 15px solid transparent;
}

.balloon__contener .balloon__right {
  width: 100%;
  position: relative;
  display: block;
  float: right;
  max-width: 80%;
  clear: both;
}

.balloon__contener .balloon__right figure {
  right: 0;
}

.balloon__contener .balloon__right .balloon__text {
  margin-right: 80px;
  position: relative;
  padding: 20px;
  border-radius: 10px;
  background-color: #eeeeee;
  /* 吹き出し */
}

.balloon__contener .balloon__right .balloon__text::after {
  content: '';
  position: absolute;
  display: block;
  width: 0;
  height: 0;
  right: -10px;
  top: 12px;
  border-left: 15px solid #eeeeee;
  border-top: 15px solid transparent;
  border-bottom: 15px solid transparent;
}


@media only screen and (max-width: 767px){
  .balloon__contener .balloon__left,
  .balloon__contener .balloon__right {
    max-width: 100%;
  }
}
クイックタグに目覚めたあなたに
AddQuicktagプラグイン
ボタン一つでなんでも追加してくれるクイックタグ、便利です!!
ビジュアルエディタ側で表示させるにはJSを読ませたり結構な手間がかかります。
そのあたりを簡単に実現したい時はAddQuicktagプラグインのインストールをオススメします!
このブログでもよく使うタグはクイックタグにしています。
めんどくさがりマンの私でもポチれば表示されるので、とっても助かっています。
まとめ
ショートコードもクイックタグも便利ですね。
これからも楽できるカスタマイズを見つけたら報告していきます!

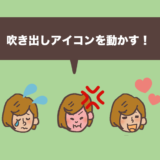
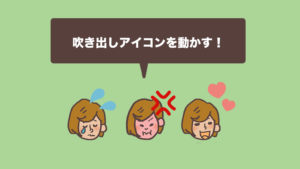 |
こいつ…動くぞ!吹き出しで会話する時のアイコンにCSS3でアニメーションをつけてみた(DLできるオリジナル表情アイコンセット付き) |